Fresh Install - Template Messed Up?
original source: http://www.joomlashack.com/tutorials/300-fresh-install-template-messed-upOne of the most asked questions we get in our support ticket system, as well as the forum, is why a particular template is 'messed up, broken, not right, etc etc' upon first installation.
The following is taken from a tutorial on how to set up the Lightfast template with Joomla 1.5, however, there are some concepts that might help a user of any Joomlashack template understand why a template does not look like the demo right out of the box.
This information is not designed to help you set up any particular template besides Lightfast (for that please see the template documentation in the demo of the template you are seeking help with) but it is important as a user of Joomla to grasp some concepts that will make life a little easier as you learn how to use this sometimes confusing system.
Should you need further assistance after viewing this information and the documentation for your template, please visit our Community Forum and post to an appropriate thread for assistance.
Default Template installed
New installation of Joomla 1.5 - Default Template
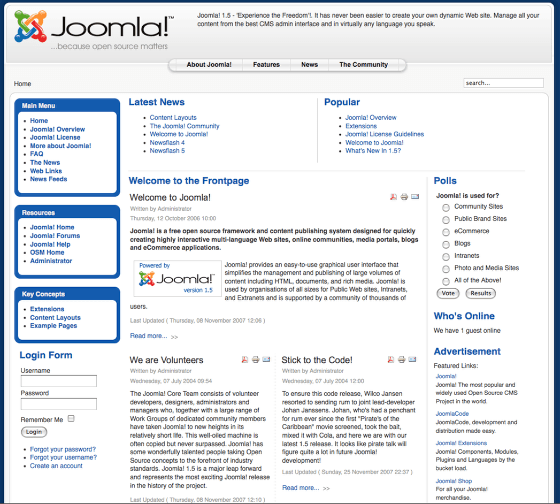
So you've installed Joomla successfully, and now you want to us a profession template. First you need to install your template. For help with installing that template, see the tutorial 'How do I install a Joomlashack Pro Template'
Joomlashack Template installed
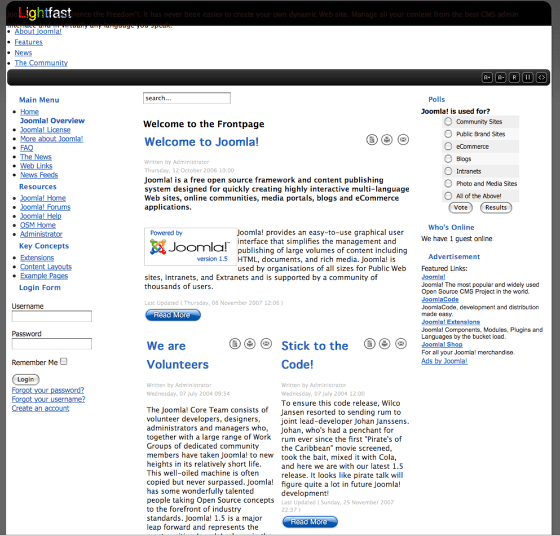
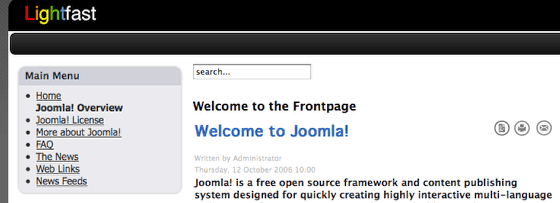
You've successfuly installed yoyur template and set it as the 'default', and gone to view your wonderful new template... and WHOA! It looks like something went terribly wrong!
...it's not all that bad - you just need to do some simple template setup now. Keep reading and it will all look good in no time.
First Things First - know your available module positions!

Before you can put things where they belong (or where you want them), or move things from where they don't belong, you need to know what module positions are available with your particular template. Each template demo contains a 'Module Map'. The module map will outline your available module positions. This is the Module Map for Lightfast, to view the module map for your particular template, see the Demo.
What's all that content all over the place?

Let's have a closer look at the top of the template where everything seems to be all messed up. Notice the module positions. Now, have a look at the next screenshot that shows the default template in use with the same default content.
So that's what that is!

For now, we're just going to get rid of that unwanted content from the top of the template.
Unpublish that content!

As mentioned above, for now were simply going to unpublish that content so we don't have to look at it anymore. If you want, you can come back to it and put it in a more suitable place later.
So to the task - go to your Module Manger and look for the highlighted items above (if you don't know how to get to your module manager, you may wish to Get a Book! .... you may also ask as many noob and not so noob questions as you want in our Community Forum) The items are 'Newsflash' and 'Top Menu' if you can't make them out from the pic.
Click on the green arrow to unpublish the items, or open the items and unpublish them.
It's Magic!!!

The content that was published in all the wrong places is now gone!
Now to the task of setting up some menu / module formatting.
**The information from here on is very specific to setting up the Lightfast template, however, the concepts are the same for ANY template. See the demo for your particular template for specific suffixes and menu setup instructions!
Know your available module styles.
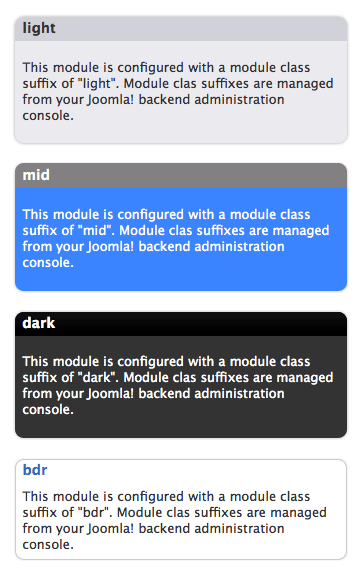
The above image shows the 'Module Class Suffixes' and corresponding formatting for the Lightfast template (for your template's available suffixes, see the Demo). We're going to set our Main Menu to have the formatting of the 'light' suffix in this example.
Add the suffix.
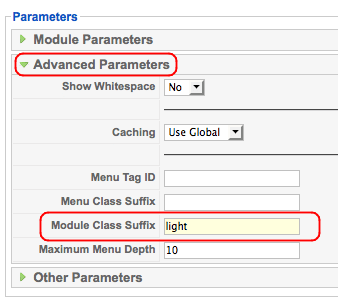
Module Class Suffixes may be added to the module in the module's 'Advanced Parameters'. ..... see above.
You'll probably have noticed when you first accessed that parameter area, the suffix field contained _menu -- just delete that pesky default suffix and replace it with the 'light' suffix (no quotations please)
Save your work and view your site.
Not quite right... but closer....
Now we have some formatting for the module background and title... but those menus still need some work. So, back to the module parameters to set the 'Menu Style' so it looks a little better.
Set the Menu Style
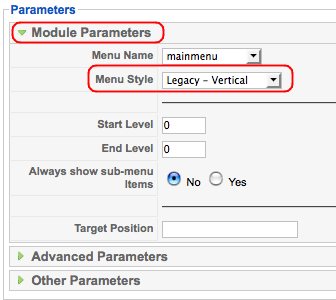
Go back to your Main Menu module and look at the parameters again. This time it's the 'Menu Style' that we want to change. By default, it's set to 'List' - change that to 'Legacy - Vertical' and save your work.
Now go view your site again. The menu should be good to go now.
To Recap

Getting your menu modules to have some formatting is as simple as going to the module you wish to format and setting the parameters correctly. Depending on which color/formatting you wish to use, you will add the appropriate 'Module Class Suffix' (see available suffixes above, or in the template demo), and you will set the 'Menu Style' to 'Legacy - Vertical'.
You can repeat these steps for all of the modules in the template.
We only need to get a menu up top now, and we will be off and running with our shiny new template. Read on for how to accomplish this final setup step.
Publish the Top menu to the Top position!
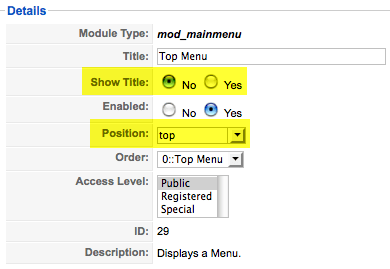
Remember those items we shut off beause they were in the wrong place. Well, one of them was the 'Top Menu' and we are now going to move it to it's new home. Go back to your Module Manager and open up that menu, set the postion to top, set 'Show Title' to No.
Now look to the parameters on the right (gonna do this one without pictures now 'cause you're getting to be a pro!) and set the 'Menu Style' to List, and remove the default class suffix in the Advanced Parameters.
Save your work and view your site.
Go forth you Joomla Pro!
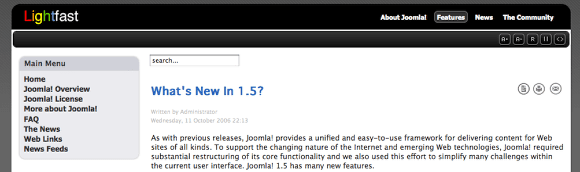
Your menus should be set up properly now, and you can replicate these steps for all of your other modules.
Remember, if you need help, you can always post in our Community Forum in an appropriate thread for assistance.
Thanks for using Joomlashack's template, and Have Fun!


0 comments:
Post a Comment